150g roast nuts (I used the Tesco finest luxury selection which had pecans, almonds, hazelnuts, macadamias and pistachios in it, nom..)
Directions;
Pre-heat your oven to 180C
Melt the butter and chocolate together over a low heat
Add the sugar to the butter and chocolate, stirring to dissolve
Beat the eggs and stir into the batter
Add the whole roast nuts, vanilla and rosewater and mix
Sift in your flour and mix until just combined
Pour the mix into a well greased tray and bake for 20-25 minutes (or until a knife comes out clean)
Cut into squares and cool on a wire rack.
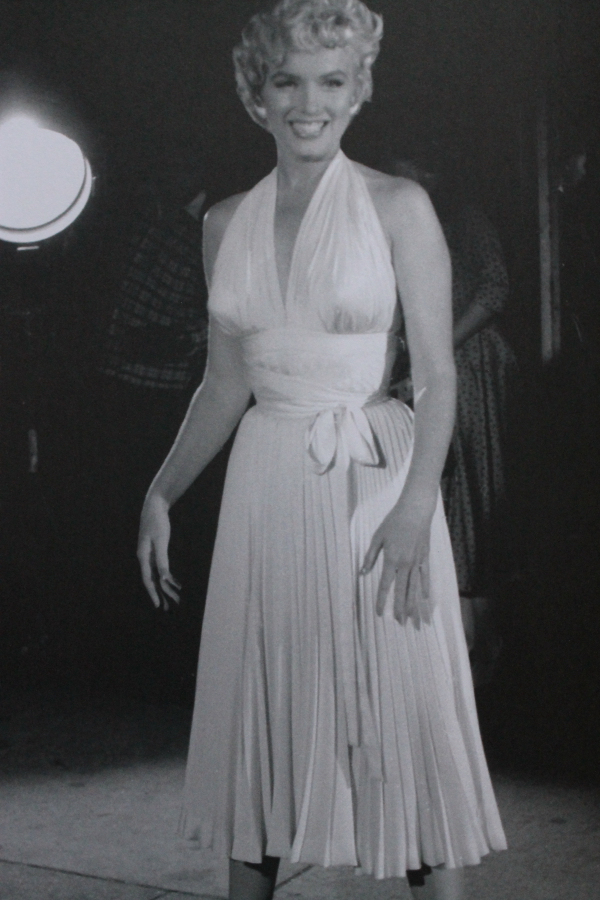
I made these for my sister's husbands family on a recent visit of theirs to Ireland, rosewater is a bit of an obsession of mine (I've tried adding it to nearly everything at some point, even tea!) and along with the extravagant nut mix really makes this a very special brownie recipe. It's amazing how much these taste like Turkish delight! I borrowed the lovely photo up top, I'm not a fan of using other peoples photography on blogs as a rule (it seems really impersonal and emotionless to me) but it is actually so hard to photograph brownies well and it just wasn't happening for me at the time (I really tried, they just looked so awful, totally unworthy of the recipe) so I made an exception this time, plus it's a really pretty picture :)
P.S. This is Pumpkin. He's a little poorly but with much love, nursing and trips to the vet is hopefully well on his way to better days. He has a pink nose and loves having his tummy rubbed. I grabbed him off the middle of a busy main road last night. Some of the photos are a little blurry because he's in quarantine in our bathroom and the light in their sucks for photos, but fear not there will be many more adorable kitten photos in the future! So much for our not getting any more kittens and getting the travel the world one day plan. Oh well, life's too short not to have kittens at least some of the time :)
I'm never sure why we look forward to the Summer so much in Ireland, there was a ferocious storm all day, so me and the cats decided to stay inside, there's never a shortage of things to do around the flat.
I sorted my button collection by tone.. It's like making a puzzle only easy and way more fun and satisfying. Yes, I am a super-dork, I already know that, but look how pretty they look now!
I took pictures of my flowers...
I arranged my new glasses on the kitchen window where the light could catch them.. Just because things are useful doesn't mean they can't be pretty too. I also have the best kettle in the world which happens to be cerise pink.
Poppy was bored from being stuck inside and insisted on spending the day making silly faces at me..
My awesome friend Lesley came over for lunch and brought the most amazing presents, including an unbelievably cool sewing book that has the patterns for some of the most iconic dress's from the last fifty years. That girl knows me too well. And as if that all wasn't cool enough, she even picked a tea towel that matches my new crockery before she'd ever seen it! What amazing girl intuition! Lesley, if you're reading this, thank you so much (there really was no need, but obviously I'm smitten you did :), I'm really glad my dress served you so well at the wedding and I love you loads xx
A lovely little folk-art brooch for my collection
I also wore my new shoes for the first time, you just can't have too many really shiny shoes...
Then I made a little brooch out of scraps of cotton, linen and lace...
I also finished making my polka-dot dress a little while ago (at around 2.00am, way too late for an outfit post!), it actually went pretty much glitch-free, apart from a bit of hassle with the armhole facings. Pretty amazing stuff for a Burda pattern (which are notoriously confusing to follow), but you'll have to wait and see that another time. Hope you all had an equally great day!
Life's been a little hectic the last week what with work, my excessive cat cuddling duties and all that. I haven't gotten much of a chance to update the blog for a bit so here's a big catch-up on what I've been up too...
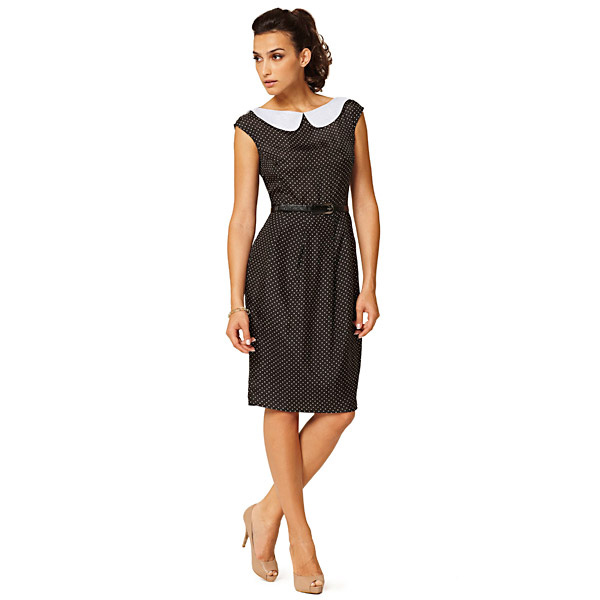
I purchased some very sweet heart and polka-dot novelty fabric that I've been resisting for agesin my local craft shop. I'm in the middle of making this adorable peter-pan collar dress with it...
The collar will be in a slightly off-white plain cotton and to give it a more flirty and relaxed feel for summer I'm going to use a half-circular skirt pattern instead of the fitted skirt provided. I'm kinda addicted to circle skirts at the moment, especially since I figured out how easy it is to build in a mock petticoat with tulle! (Tutorial will follow at some point, I promise!)
This is how it looks so far. This pattern doesn't actually have a separate set in sleeve but has a sort of baby-raglan built into the main bodice pieces (the shoulder seams are extended down the arm into a mock sleeve), the result being a super-cute sleeve-like effect with pretty much no effort on my part!
Another interesting little feature of this pattern is that the peter-pan collar actually only extends as far as the shoulder seams and is secured within the shoulder seams between the front and back bodice sections, rather than continuing all the way around to the centre back seam. I'll do an outfit post on this when it's finished with some close ups of these details.
I'm obsessed with fully lining dresses, lining a dress is a hell of a lot of extra effort, but the end result is so worth it. If you go that extra mile with your dress-making, your dress with drape infinitely better, radiate quality and craftsmanship, wear better, last longer and even make you look slimmer!
Lately I have begun using the self-fabric (my lovely red polkadot cotton in this case) to line the bodice of dresses I've been making. I only tried doing this for the first time relatively recently and it gives a really polished, professional look to the bodice. Usually you would use a plain white or black cotton (a bit boring), or something synthetic like nylon or polyester, but they don't 'breath' enough for a cotton day dress.
There is a uniquely Irish conundrum that arises from using cotton as your lining fabric, as we rarely get a day warm and/or dry enough for going bare-legged I spend nearly the whole year in tights. As a result, I personally prefer to use the two different fabrics in the one dress lining, cotton for the bodice and nylon for the skirt. This is because an underskirt made in nylon or some other slippery synthetic won't snag or ride up on your tights like a cotton one always does (is it just me or does that drive you crazy too!?). It doesn't look quite as pretty or perfect as using the same fabric for the whole piece but it's far more practical for an Irish dress-maker!
I'm not sure how the armhole is going to look seeing as the pattern isn't actually for a lined dress, but rather uses facings but I'm hoping it'll look even better this way when I'm finished with it. I think I may use the armhole facing to encase both my bodice and lining armholes.
I love having Mondays off work, there's no weird sense of obligation in the air like there is on a Friday or Saturday and I can happily mosey around the house all day (in my jammies), catching up on house-work and other projects without feeling like I'm missing out on anything exciting happening elsewhere!
So as soon as I got up this morning I went outside with my coffee and spent an hour hanging out with my moggies and taking some pictures in the garden.
One of my neighbours (or so I'm assuming anyway!) planted a flowering cherry tree in the corner of our communal garden recently, it was a lovely little surprise to find when I came home from work!
My Sweet Williams and Geraniums have blossomed yay!
A bumble-bee enjoying the wild Valerian.
I also got my latest fix of Mollie Makes. I've been saving it for a cuppa in the garden later this afternoon, I get quite excited when my local newsagents finally gets the newest edition in!
Super-cute 'handmade with love' ribbon that came with it..
My favourite project in this issue is a gorgeous satchel style tablet case, now all I need is an Ipad to make it for!
And now, random music video time...
This is such a cool video, I very unexpectedly saw these guys perform over the weekend (I won tickets the day before the gig), and I had the most fun and frivolous night of my life with my two lovely friends Alle and Jacqui. Thanks for the crazy, crazy night girls, you guys rock!
I collect many things; sewing patterns, buttons, red shoes, cats. Lately I've been collecting brooches too. for some reason, they seem to be a little out of fashion these days.
Just a couple of photos from my college show last week. Unfortunately our camera decided to not work at the last minute so I only have the shots the photographer got which are a bit out of focus, it's still great to have any though! I went for a super summery/girlie fifties theme with colour-block accessorizes to make give it a more contemporary edge.
One thing I love about sewing is that it means I have an almost never ending need of pretty little boxes, baskets and jars in which to store my buttons and ribbons and cotton, the result being that my sewing space is arguably the prettiest corner of my apartment. I love using jars and baskets to store all my sewing bits in, because not only is it the most practical option (keeping everything close to hand, minimizing any potential frustration when in a fit of sewing frenzy) but sewing notions are usually so colourful and make for very pretty ornaments when put on display!
I came across the idea of a kilner jar pin cushion in a recent issue of Mollie Makes and although I've looked online for a good tutorial on how to make one, none have really struck me as particularly clear or straight forward (also, I must be one of the only crafty people in the universe who doesn't yet own a glue gun!), so after spending at least an hour lying awake last night I managed to devise an alternative gluegun-free method, here's how it goes:
What you'll need: kilner jar (you can sometimes get them in your local junk/cooking supplies shop or you can buy online)
Pretty fabric scrap (a small piece, 5 or 6 inches squared would be plenty)
Piece of felt the same size
Ruler and pencil/pen
Quilt wadding or cotton wool for stuffing (wadding works best!)
Sewing machine or needle and thread
Super glue or equivalent all-purpose craft glue
Scraps of lace or ribbon
Embellishments, I used a gift tag and paper flowers on wire stalks
Step 1: Un-screw your kilner jar lid and use the inner plate to trace a circle onto the wrong side of your fabric.
Step 3: Using a ruler add 1 inch all the way around your original circle (this will allow us to wrap the fabric over the stuffing and kilner jar lid). Cut out circle.
Step 3:Trace a circle onto your felt, but this time don't add the one inch. Cut out.
Step 4: Using your sewing machine (or needle and thread if you don't have one), stitch two rows of gathering stitches aproximately 1/2cm and 1cm in from the outer edge of your circle using a straight stitch on the longest stitch setting. If you're hand stitching, try to make them between 3 and 5mm long. We use two rows when gathhering fabric so that the it will gather more evenly and be less likely to pucker.
Step 5: Working on the wrong side (back) of your fabric, gently pull the top two threads which are facing you until the fabric starts to gather. Keep easing the gathers along the edge of the circle until you get something that looks like this:
Step 6: Stuff your gathered fabric with wadding or cotton wool, you may need to check it against the lid to get the right fullness.
Step 7: position the plate onto the wadding, wrapping the gathered edges of the fabric around the circumference.
Step 8: Apply some strong all-purpose craft glue to the inner groove on the jar lid (this will hold our cushion in place).
Step 9: Now position the cushion (with plate tucked in) into the lid, until you get something that looks like this:
Step 10: Apply a layer of fabric glue all around the gathered edges of your fabric and position the felt circle you cut out earlier on top.Screw the lid onto the glass bottom tightly (this will allow the glue to dry with everything secured tightly in place)
Now for the best bit, have fun with your embellishments!