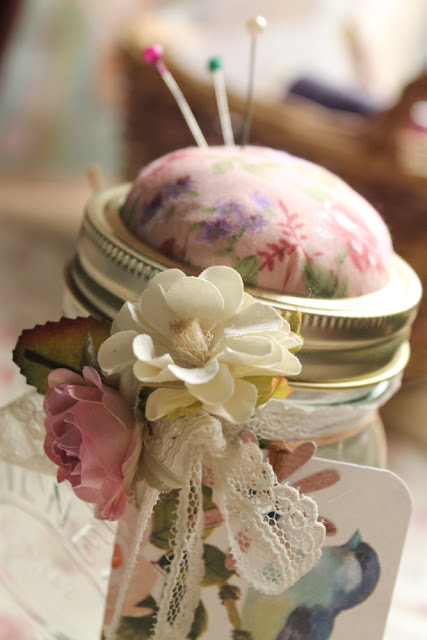
One thing I love about sewing is that it means I have an almost never ending need of pretty little boxes, baskets and jars in which to store my buttons and ribbons and cotton, the result being that my sewing space is arguably the prettiest corner of my apartment. I love using jars and baskets to store all my sewing bits in, because not only is it the most practical option (keeping everything close to hand, minimizing any potential frustration when in a fit of sewing frenzy) but sewing notions are usually so colourful and make for very pretty ornaments when put on display!
I came across the idea of a kilner jar pin cushion in a recent issue of Mollie Makes and although I've looked online for a good tutorial on how to make one, none have really struck me as particularly clear or straight forward (also, I must be one of the only crafty people in the universe who doesn't yet own a glue gun!), so after spending at least an hour lying awake last night I managed to devise an alternative gluegun-free method, here's how it goes:
Pretty fabric scrap (a small piece, 5 or 6 inches squared would be plenty)
Piece of felt the same size
Ruler and pencil/pen
Quilt wadding or cotton wool for stuffing (wadding works best!)
Sewing machine or needle and thread
Super glue or equivalent all-purpose craft glue
Scraps of lace or ribbon
Embellishments, I used a gift tag and paper flowers on wire stalks
Step 1: Un-screw your kilner jar lid and use the inner plate to trace a circle onto the wrong side of your fabric.
Step 3: Using a ruler add 1 inch all the way around your original circle (this will allow us to wrap the fabric over the stuffing and kilner jar lid). Cut out circle.
Step 3:Trace a circle onto your felt, but this time don't add the one inch. Cut out.
Step 4: Using your sewing machine (or needle and thread if you don't have one), stitch two rows of gathering stitches aproximately 1/2cm and 1cm in from the outer edge of your circle using a straight stitch on the longest stitch setting. If you're hand stitching, try to make them between 3 and 5mm long. We use two rows when gathhering fabric so that the it will gather more evenly and be less likely to pucker.
Step 5: Working on the wrong side (back) of your fabric, gently pull the top two threads which are facing you until the fabric starts to gather. Keep easing the gathers along the edge of the circle until you get something that looks like this:
Step 6: Stuff your gathered fabric with wadding or cotton wool, you may need to check it against the lid to get the right fullness.
Step 7: position the plate onto the wadding, wrapping the gathered edges of the fabric around the circumference.
Step 8: Apply some strong all-purpose craft glue to the inner groove on the jar lid (this will hold our cushion in place).
Step 9: Now position the cushion (with plate tucked in) into the lid, until you get something that looks like this:
Step 10: Apply a layer of fabric glue all around the gathered edges of your fabric and position the felt circle you cut out earlier on top.Screw the lid onto the glass bottom tightly (this will allow the glue to dry with everything secured tightly in place)
Now for the best bit, have fun with your embellishments!

E Voila!


oh my god this is simply lovely! it'd make a perfect gift!
ReplyDeletesooo cool! I must try that myself, looks amazing! :)
ReplyDeleteThanks :) It would take and hour max, so worth the effort!
ReplyDeleteLovely! Thank you for sharing ps Love your blog
ReplyDeleteThanks Sarah Jane, lovely to hear from you :)
ReplyDeleteI'm about to make one of these and your tutorial was just so clear to follow, thank you!! x
ReplyDeleteGreat tutorial - made one for a stitcher I know. Blooged about it here and credited your tutorial.
ReplyDeleteAll the best Alli
http://theemptyoxobox.blogspot.co.uk/2014/01/kilner-jar-pin-cushion-tutorial.html